
I have seen these on Etsy (and even tried to win one in a giveaway with no luck) Remember now I know these are not a great expense buying them but for our family it is!So I did a bit of research on possibly making my own, we have lots of scrap material around here. I seem to go to thrift stores, bargain bins at stores, and garage sales and pick up fabric I never seem to use. So as it is collecting I figure I should make use of it. ( I am not even going to talk about the fact that I recieved a brand new sewing machine last year as a gift because they thought I would use it- it also sits in the closet with the fabric not having sewed one stitch.)
Here is the wonderful store on Etsy that sells them called Giggle Junction!!
I love these things and would love for my youngest to be able to play with them. Keep in mind this is only the one that I Favorited on Etsy, I have not looked to see if they are being sold elsewhere.
These are a few favorites from her shop that I really like. I love the Spikey Dinosaur and the Turtle. But she has so many different themes and varieties available I really suggest taking a look. I admire her work- these I-spy bags are non-toxic and hold 30 items inside for children to find. And one of the best features is that they are washable per her instructions.
The cost of these 7x7 bags is extremely reasonable at $15.00. And she also has a couple of party packs available for sale as well. Again I would really like you to head over to her shop and take a look at her sensory bags or I-spy bags.
And now on to the DIY- for the crafty ones. I plan on giving it a shot.
I Spy Bags are a really cool activity/toy for a preschooler. They are also super easy to make. It is almost as easy as making a simple pillow. The vinyl window adds a little challenge, making this a good project for an advanced beginner.Basically, an I Spy Bag is a bean bag with a viewing window. It is filled with poly pellets and novelty buttons and small objects. A child (or grown up!) can sift through the bag, looking through the window, and find the hidden objects. You can make a no-sew I Spy bag using a ziploc bag filled with rice and small objects.
Directions:
Cut your fabric to the desired size. Make the bags roughly 8" x 8", so cut a piece that is about 18" x 9".Cut a square in the center of the fabric. Square should be slightly smaller than the desired window size. Windows are 3.5" x 3.5", so generally cut a 3" square. Then cut small diagonal lines at the corners to open up the window.Cut your clear vinyl much bigger than the hole

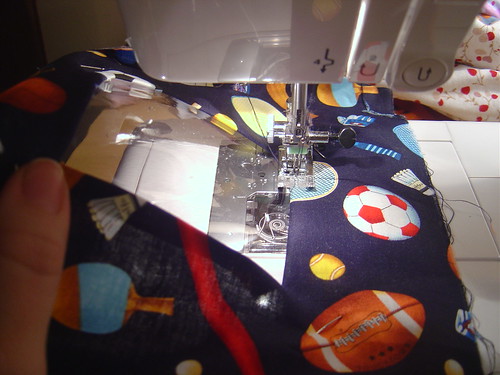
Lay vinyl on wrong side of hole and fold "flaps" (created by diagonal cuts) under so they are "trapped" by the vinyl. Pin vinyl to fabric outside of where you are going to sew. You do not want to put additional holes in the vinyl and fabric at the edge, where you will sew.Sew around window opening, stitching vinyl and fabric together. Use a narrow double needle for extra reinforcement. Hold the vinyl and fabric up off the machine, as the vinyl tends to stick which can ruin your stitches.

Make sure your stitches leave no openings!! Trim vinyl down so only 1/4" to 1/2" remains outside seam.Make sure wrong sides are together, and sew around edges, leaving a small (2-3" opening for turning. You can use a double needle if desired, but you will topstitch which will add reinforcement.Turn fabric right side out. You should now have an empty bag with a small hole in the top. Choose your novelty buttons and items to go inside bag.

It doesn't matter if you fill with buttons or poly pellets first. When you fill with poly pellets, I would suggest using a funnel and pouring over a cookie sheet or large rubbermaid lid, because poly pellets make a huge mess when they spill.After your bag is filled (use your own judgment on how full to stuff it), topstitch around the edge, closing the hole and reinforcing the outer edge.
No comments:
Post a Comment